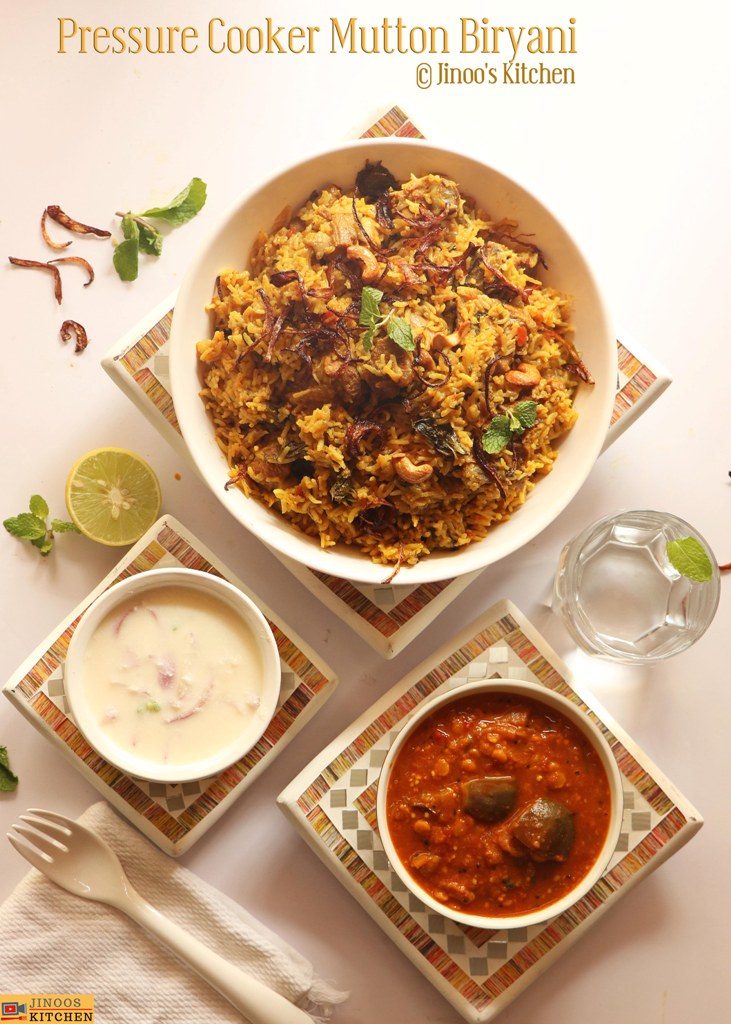
Pressure Cooker Mutton Biryani recipe | Easy mutton biryani recipe in pressure cooker with step by step photos and video recipe. In south Indian homes, pressure cooker biryanis are preferred over the mutton dum biryani. as this is simple and easy process that can be made with one pot.
We call this as “veetu biryani” , unlike restaurants this is typical home styled recipe with just enough flavors and rightly cooked in pressure cooker. mutton biryani, dalcha and onion raita is the best ever combination.
some of the popular mutton recipes: mutton curry for rice, mutton sukka, mutton dum biryani, mutton chinthamani, etc., This recipe is similar to the pressure cooker chicken biryani recipe
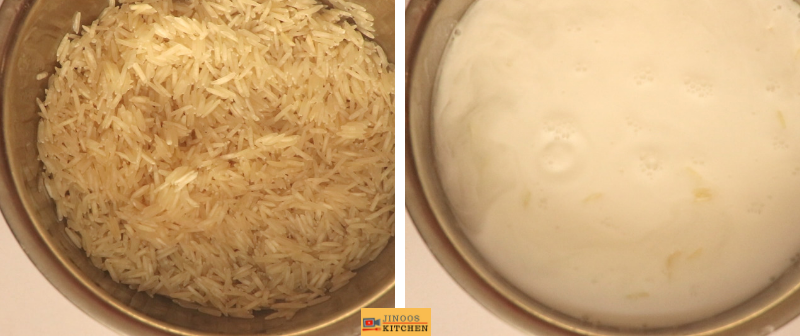
In this recipe mutton is cooked until soft and tender and then soaked rice is added. we at our house, prefer soaking the basmati rice in coconut milk and it gives out such a good flavour to the biryani. If you do not want to add coconut milk, replace it with water.
Pressure Cooker Mutton Biryani recipe

Easy mutton biryani recipe in pressure cooker
Ingredients
- 1 cup basmati rice
- 1 cup coconut milk
- 2 tbsp oil
- 1 tsp ghee
- 2 no bay leaf
- 1 pinch stone flower
- 1 no black cardamom
- 1 small piece mace strand
- 3 no cardamom green
- 1 inch cinnamon
- 4-5 no cloves
- 1 tsp fennel seeds
- 1.5 cups onion sliced
- 2 tbsp ginger garlic paste
- 2 no green chillies slit
- 1 cup tomatoes chopepd
- 1/2 kg mutton
- 1/2 tsp turmeric powder
- 2 tbsp coriander powder
- 1 tbsp chilli powder
- salt to taste
- 1/8 cup curd
- 1/4 cup water
- 1 handful coriander leaves chopped
- 1 handful mint leaves
- 2 tsp lemon juice
- 2 tsp ghee
Instructions
- firstly, wash and soak the basmati rice in coconut milk until use
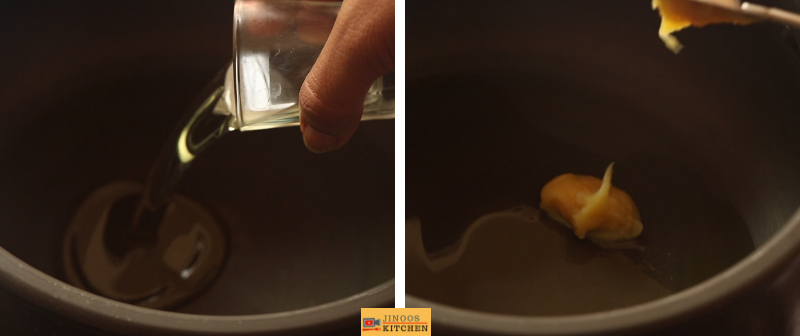
- heat oil & ghee in a cooker. add bay leaf, cinnamon, cloves, cardamom black, cardamom green, mace strand, stone flower, fennel seeds and onions.
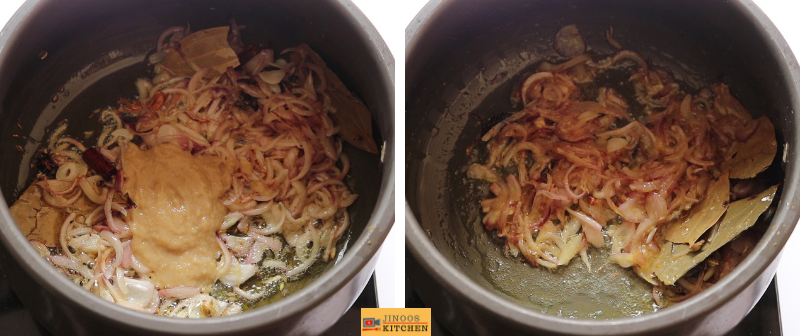
- fry until onions are brown and then add ginger garlic paste.
- fry until raw smell of ginger garlic leaves.
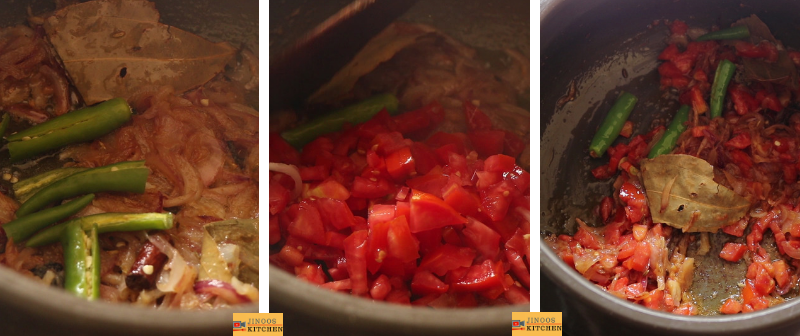
- further add tomatoes and fry until mushy.
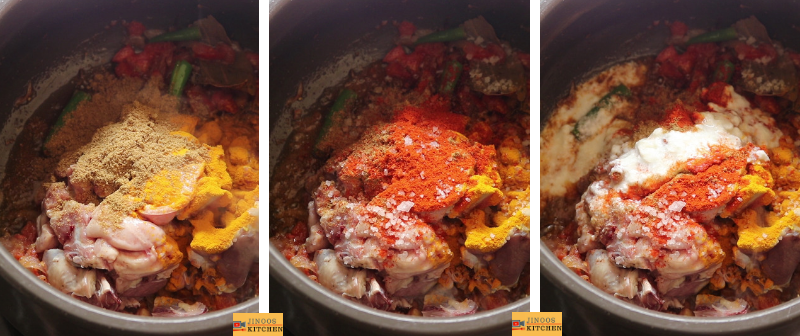
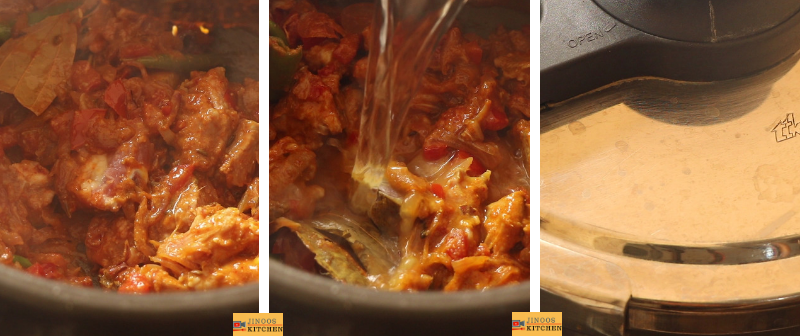
- to the onion tomato mix, add mutton, turmeric powder, coriander powder, chilli powder, salt, curd and fry for a minute.
- add 1/4 cup water, mix well. close and pressure cook for 8 whistles.
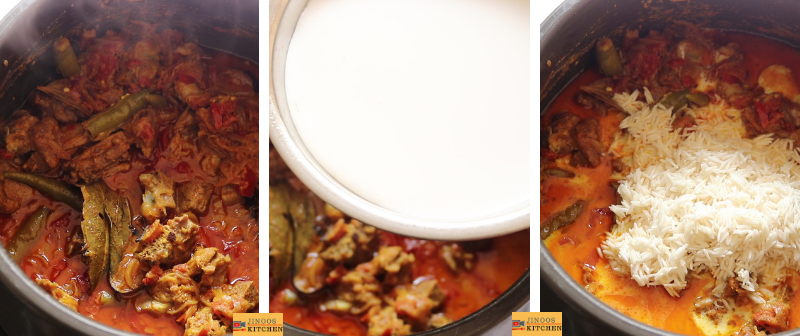
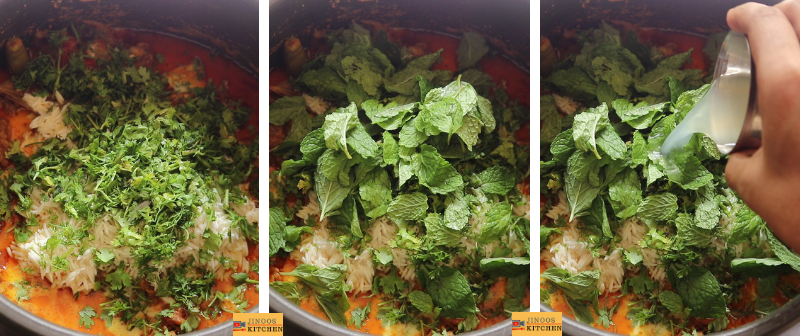
- open and add soaked rice, coriander leaves, mint leaves, lemon juice. check the seasoning.
- close and pressure cook again for 15 min in simmer.
- open once the pressure settles down completely.
- drizzle ghee on top and fluff it up.
- serve with raita and dalcha
Video
Easy mutton biryani recipe in pressure cooker with step by step photos
1.wash 1 cup basmati rice well in running water two to three times and then soak it in 1 cup coconut milk. do this step before you start cooking. let it get soaked until use.
2. heat a cooker and add oil, ghee into it. let the ghee melt.
3. add bay leaves, cinnamon, cloves, green cardamom, black cardamom, mace strand, stone flower, fennel seeds and onion. fry until onions are brown.
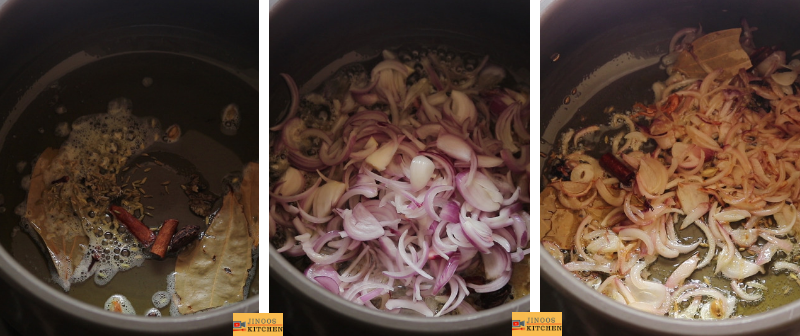
4. add ginger garlic paste and fry again until raw smell leaves.
5. now, add green chillies, chopped tomatoes and fry until tomatoes are mushy.
6. further add mutton pieces, turmeric powder, coriander powder, chilli powder, salt and curd.
7. mix well and add 1/2 cup water. we need not add water as the water from mutton is enough to cook. but in case you are unsure and need to cook for longer time, its always safe to add little water and cook. pressure cook for 8 whistle until mutton pieces are soft.
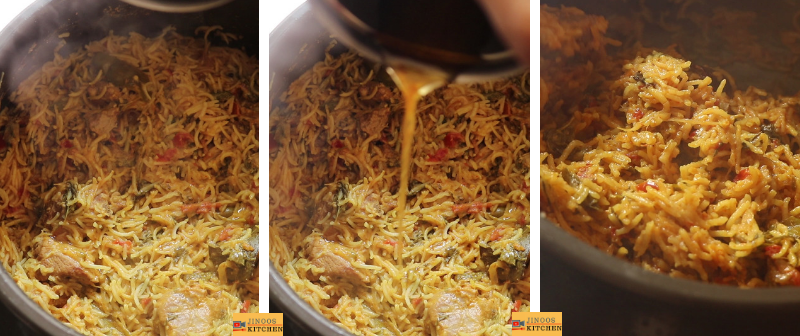
8. open once the pressure settles and you can see only every little water is left behind. 1/4 cup altogether will be left. now add the rice and coconut milk together. now in total its 1.25 cups water. based on your rice quality , liquid ratio may between 1:1 to 1:1.5. For me, its 1:1.25 always.
9. further add chopped coriander leaves, fresh mint leaves and lemon juice. reason we are not adding it earlier is I feel overcooking greens will cause a bitter taste to the essence.
10. mix well. close and pressure cook again for 15 minutes in simmer. or 1 whistle in simmer whichever is first. based on your cooker, you may get a whistle anytime after 10 minutes. put off when you get the first whistle.
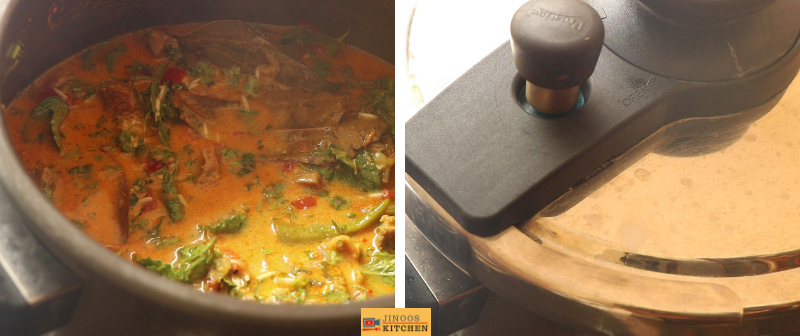
11. open strictly only after 15 minutes. let the rice take its own time to get cooked even after putting off. if you open it little earlier it may be little moistourous. open add ghee, fluff it up. it tends to get dried up after 5-10 mins. so dont get panic if it is slightly watery when super hot. once warm, it will be soft and fluffy.
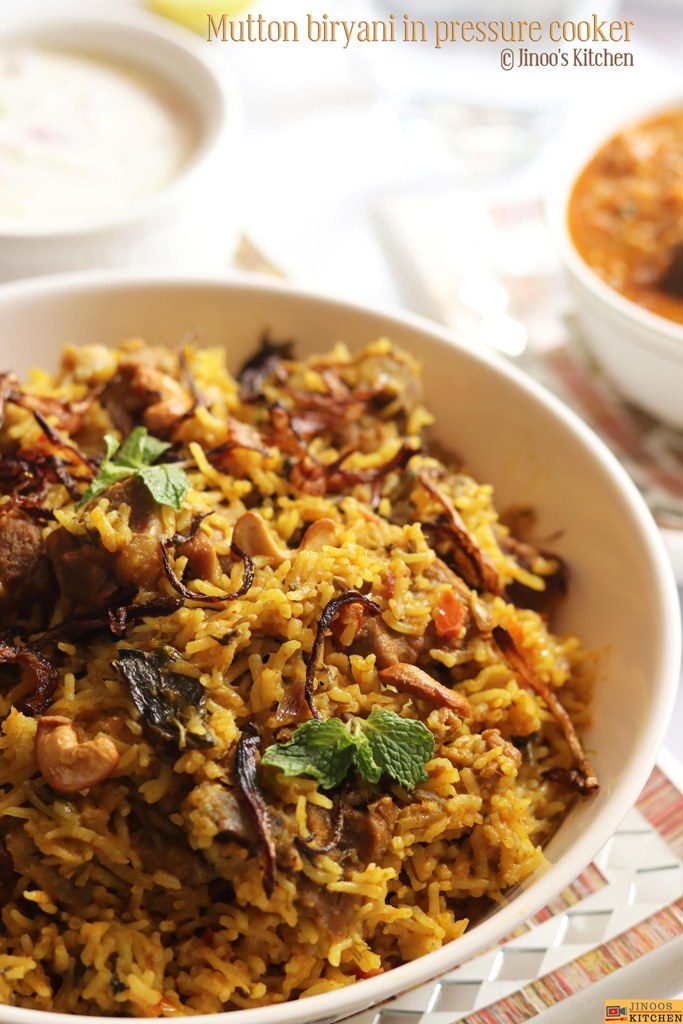
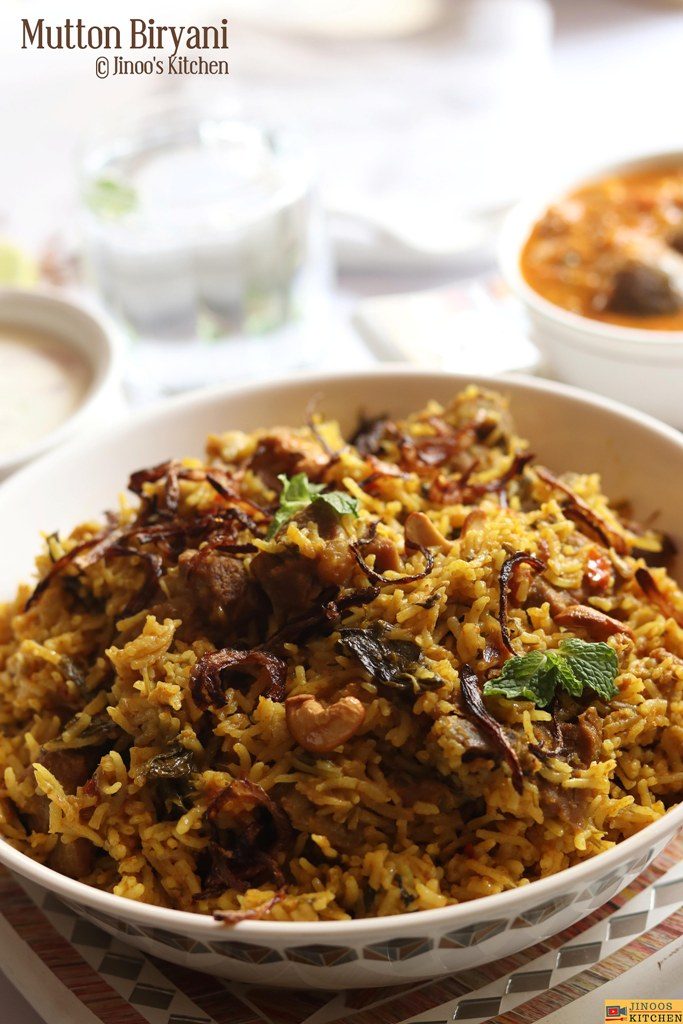
garnish with fried onions and cashews and serve the delicious mutton biryani with raita and dalcha.


The beauty of Biryani lies in the way the different spices blend to create the extraordinary flavor. It is nice that you have shared the authentic Mutton Biryani Recipe. The recipe is explained nicely here and I don’t think I will have trouble trying it myself. Keep sharing more such elaborate recipes here.